本次配置和代码都在github上
使用方法:
git clone https://github.com/kehaha-5/k8s_democd k8s_demogit fetch --allgit checkout -b tag 2.0
概要
环境
本次的环境跟上一章从零到一–搭建web项目集群 - kehaha-5的环境一摸一样,都是使用k3s来进行集群的搭建
流程
这次用到了k8s集群+jenkins+harbor构建持续交付流水线
- 手动在jenkins中触发构建
- 拉去
git项目代码 - 分别构建
vue3前端 和go后端项目 k8s_demo/web at main · kehaha-5/k8s_demo (github.com) - 修改
k8s部署文件,添加版本号和kubernetes.io/change-cause - 更新
k8s部署
这次没有私有化部署gitlab是因为没有用到webhook,是直接通过jenkins直接触发构建然后拉去的代码
Harbor
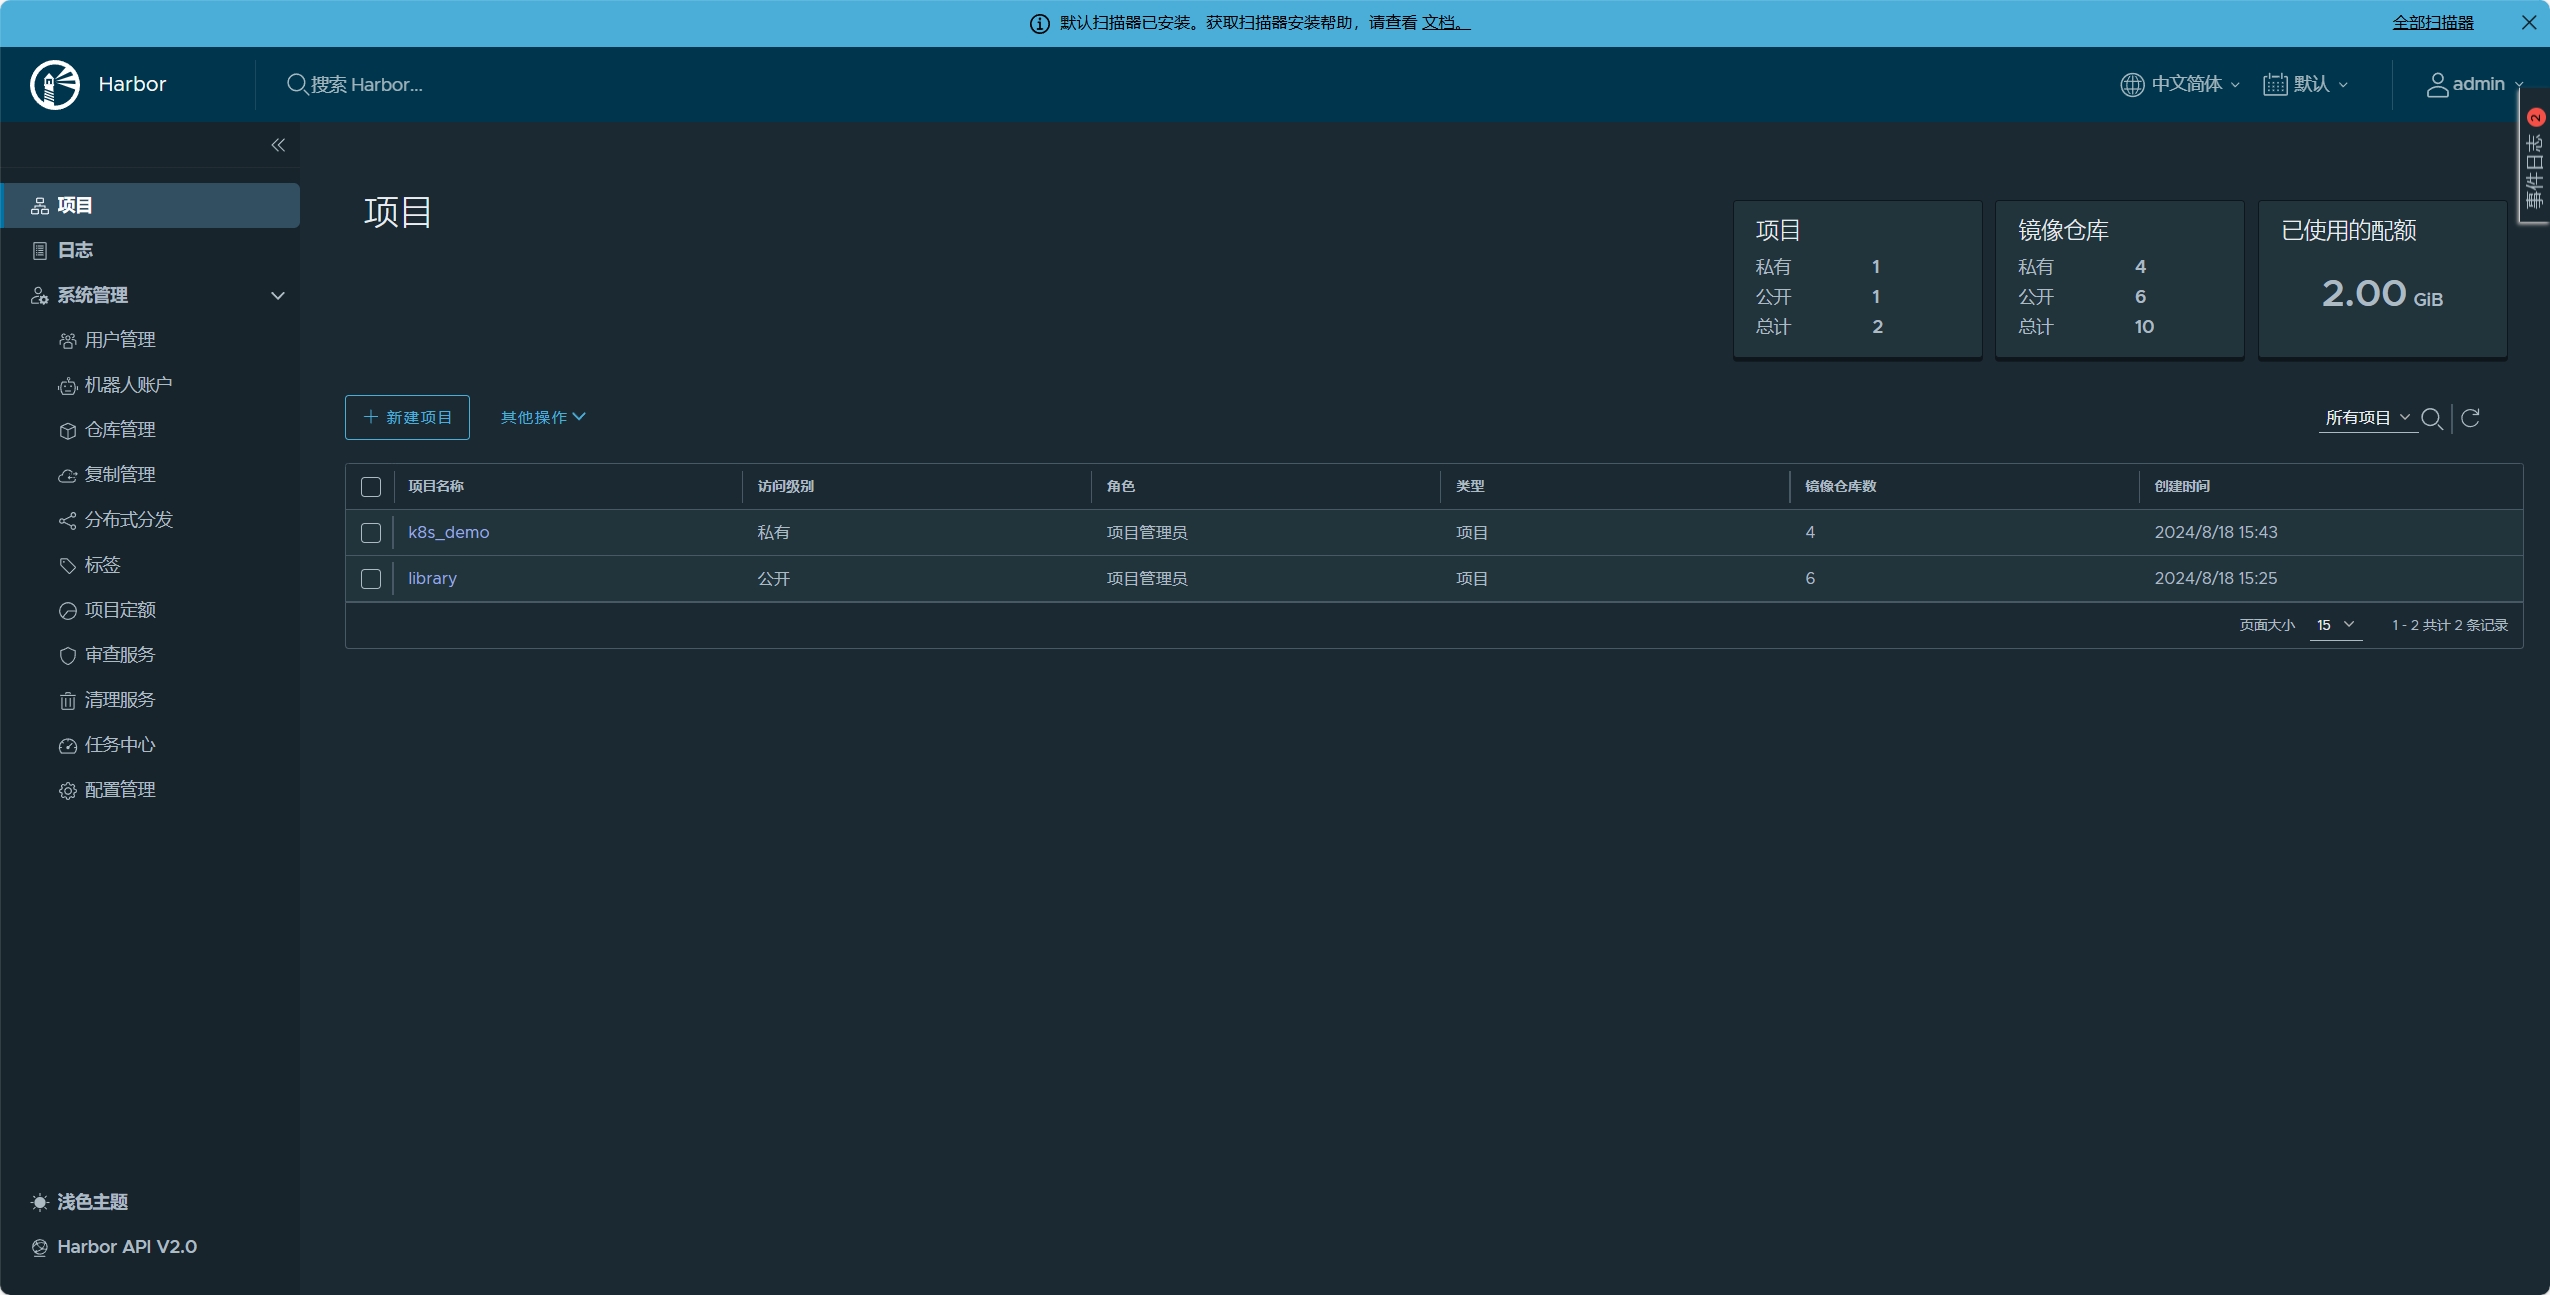
首先要先部署harbor作为私有镜像仓库,方便上传后续构建的私有镜像和所需要的镜像。
这次部署会去配置harbor的tls Harbor docs | Configure HTTPS Access to Harbor (goharbor.io) 按着该文档就可以生成对应的域名证书,并且要配置k3s的私有仓库配置Private Registry Configuration | K3s,同时在我的ubuntu系统上面还要进行update-ca-certificates Harbor docs | Troubleshooting Harbor Installation (goharbor.io)
在生成好证书以后还要把证书配置到secret
apiVersion: v1
kind: Secret
metadata:
  name: my-harbor-tls
  namespace: devops-tools
type: kubernetes.io/tls
data:
  tls.crt: |
    LS0tLS1CRUdJTiBDRVJUSUZJQ0FURS0t....
  tls.key: |
    LS0tLS1CRUdJTiBQUklWQVRFIEtFWS0tL....
这次安装是通过helm来安装,所以需要修改value.yaml来进行详细配置 Harbor docs | Deploying Harbor with High Availability via Helm (goharbor.io)
这里说一下我的expose配置,我是要通过ingress来进行对外暴露的,因为我自己生成了tls证书,所以certSource要改成secret,并且把secretName: 改成我上述配置的secret中
 ....
 type: ingress
 tls:
   enabled: true
   # The source of the tls certificate. Set as "auto", "secret"
   # or "none" and fill the information in the corresponding section
   # 1) auto: generate the tls certificate automatically
   # 2) secret: read the tls certificate from the specified secret.
   # The tls certificate can be generated manually or by cert manager
   # 3) none: configure no tls certificate for the ingress. If the default
   # tls certificate is configured in the ingress controller, choose this option
   certSource: secret
   auto:
     # The common name used to generate the certificate, it's necessary
     # when the type isn't "ingress"
     commonName: ""
   secret:
     # The name of secret which contains keys named:
     # "tls.crt" - the certificate
     # "tls.key" - the private key
     secretName: "my-harbor-tls"
ingress:
     hosts:
       core: harbor.k8s.demo
   ....
其他的按需配置即可
在成功部署以后,先把项目需要到的镜像进行构建和上传
FROM alpine:3.20.2
RUN set -eux && sed -i 's/dl-cdn.alpinelinux.org/mirrors.ustc.edu.cn/g' /etc/apk/repositories
RUN apk update && apk add tzdata
先构建后端基础镜像,到时候就流水线中直接使用,不需要而外下载所需要的包,节约流水线时间
同时在docker login以后把配置文件保存到Secret里面,方便后续在流水线中进行镜像上传
#harborLoginSecret.yaml
apiVersion: v1
kind: Secret
metadata:
  name: harbor-login
  namespace: devops-tools  # Specify your namespace
type: kubernetes.io/dockerconfigjson
data:
  .dockerconfigjson: ewoJImF1dGhzIjogewoJCSJoYXJib3IuazhzLmRlbW8iOiB7CgkJCSJhdXRoIjogIllXUnRhVzQ2U0dGeVltOXlNVEl6TkRVPSIKCQl9Cgl9Cn0=
Jenkins
这里按着官方文档Kubernetes (jenkins.io)在k8s中部署jenkins
其中因为jenkins在流水线中会使用到kubernetes的agents Using Jenkins agents,所以这里再service中要同时代理50000端口的流量,让agents可以和jenkins可以进行连接 Jenkins Remoting
apiVersion: v1
kind: Service
metadata:
  name: jenkins-service
  namespace: devops-tools
  annotations:
      prometheus.io/scrape: 'true'
      prometheus.io/path:   /
      prometheus.io/port:   '8080'
spec:
  selector:
    app: jenkins-server
  type: NodePort
  ports:
    - port: 8080
      name: httpport
      targetPort: 8080
      nodePort: 32000
    - port: 50000
      name: jnlpport
      targetPort: 50000
      nodePort: 32500
git配置
这里要去系统配置里面的凭证里面配置一个SSH Username with private key,这样才可以通过git来拉去私有仓库
同时还要再安全配置里面配置Git Host Key Verification Configuration 把它配置为Accept first connection
Controls how Git plugin verifies the keys presented by the host during SSH connecting.
Known hosts file (default)
Verifies all host keys using the
known_hostsfile.Accept first connection
Automatically adds host keys to the
known_hostsfile if the host has not been seen before, and does not allow connections to previously-seen hosts with modified keys.
Note that when using ephemeral agents (ex. cloud agents), this strategy is essentially equivalent to No verification because it uses the
known_hostsfile on the agent. To avoid this, you can pre-configureknown_hostswith all relevant hosts when creating the images or templates used to define your agents, or use the Manually provided keys or Known hosts file strategies.OpenSSH version 7.6 or higher is required to use this option with command line Git.
Manually provided keys
Verifies all host keys using a set of keys manually configured here.
No verification (not recommended)
Does not verify host keys at all.
Kubernetes
对应k8s的配置,先要去下载Kubernetes的插件Kubernetes | Jenkins plugin
并且在系统的clouds中添加一个k8s集群,其中有一个Kubernetes 地址可以不用进行配置,因为我的jenkins是部署在k8s集群里面的,在每个pods都可以访问其自身的k8s集群 从 Pod 中访问 Kubernetes API | Kubernetes
直接访问 REST API
在运行在 Pod 中时,你的容器可以通过获取
KUBERNETES_SERVICE_HOST和KUBERNETES_SERVICE_PORT_HTTPS环境变量为 Kubernetes API 服务器生成一个 HTTPS URL。 API 服务器的集群内地址也发布到default命名空间中名为kubernetes的 Service 中, 从而 Pod 可以引用kubernetes.default.svc作为本地 API 服务器的 DNS 名称。
在K8S中动态创建代理
Jenkins构建项目时,并行构建,如果多个项目同时构建就会有等待。所以这里采用master/slave架构
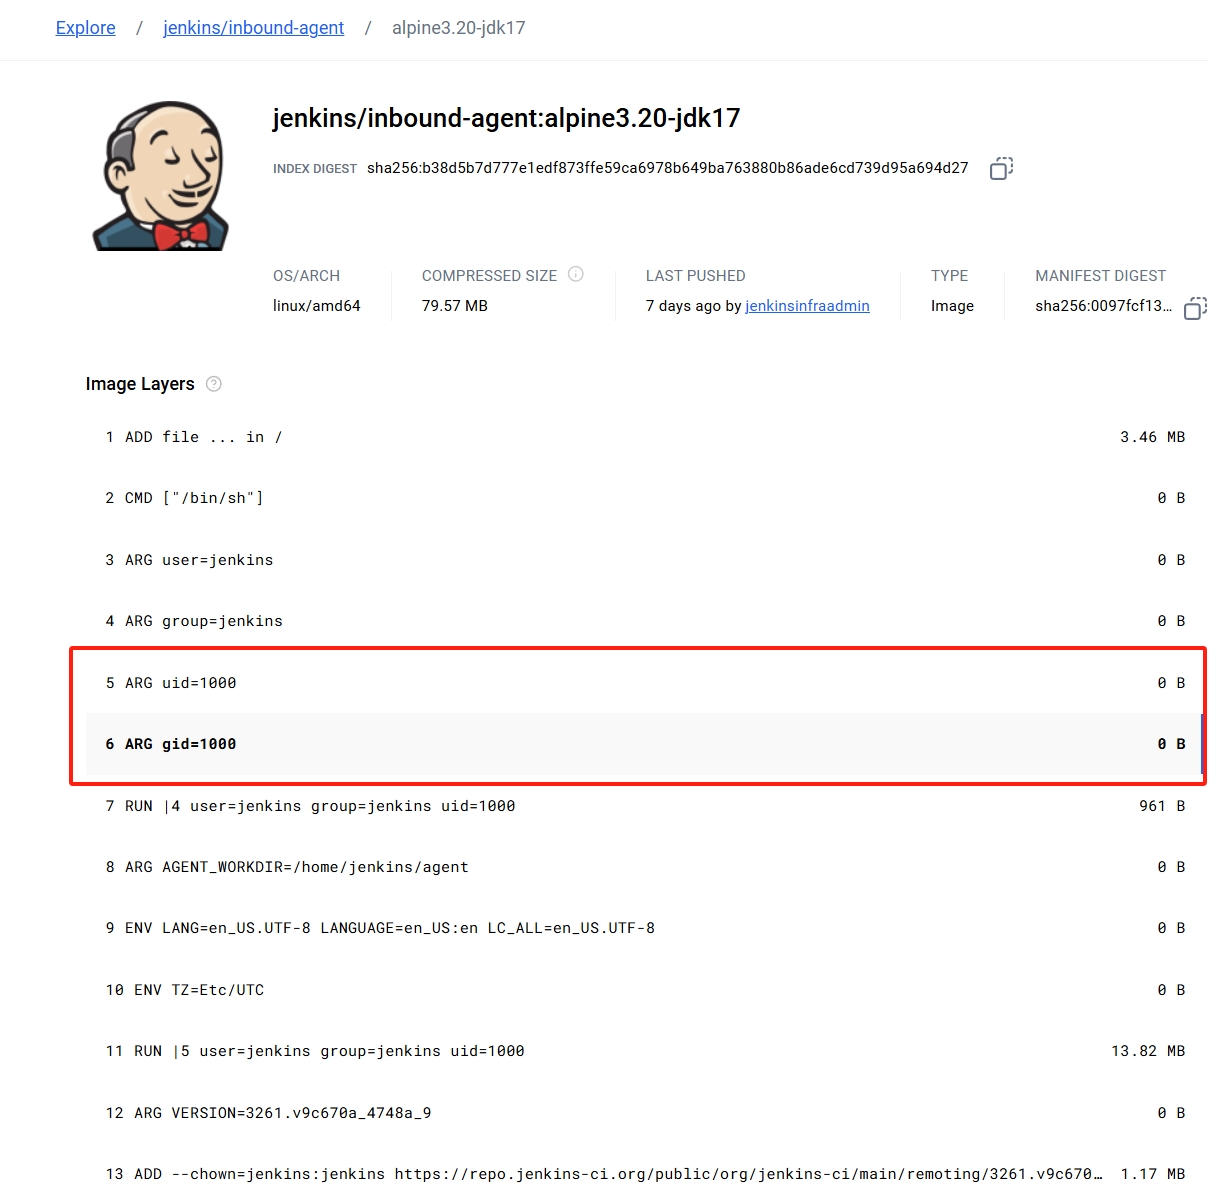
这里官方是提供了基础的slave镜像 jenkins/inbound-agent - Docker Image | Docker Hub
但是我是需要node和go环境来进行项目构建的,所以这里需要在官方镜像的基础上面添加所需要的构建工具
FROM jenkins/inbound-agent:alpine3.20-jdk17

# 切换到 root 用户
USER root

RUN set -eux && sed -i 's/dl-cdn.alpinelinux.org/mirrors.ustc.edu.cn/g' /etc/apk/repositories && apk update  &&\
apk add nodejs npm && npm config set registry https://registry.npmmirror.com/ && \
npm install @vue/cli@5.0.8

COPY go1.22.6.linux-amd64.tar.gz /app/go1.22.6.linux-amd64.tar.gz
COPY kubectl /usr/local/bin/

RUN rm -rf /usr/local/go && \
    tar -C /usr/local -xzf /app/go1.22.6.linux-amd64.tar.gz && \
    ln -s /usr/local/go/bin/go /usr/local/bin/go && rm -rf /app/go1.22.6.linux-amd64.tar.gz

USER jenkins
把它打包成镜像并上传到私有的harbor中
在K8s中的权限配置
因为在流水线中,会使用kubectl对不同namespace的deployment进行操作所以需要有对应的权限
apiVersion: v1
kind: ServiceAccount
metadata:
  name: jenkins-prod
  namespace: devops-tools

---

apiVersion: rbac.authorization.k8s.io/v1
kind: Role
metadata:
  namespace: prod
  name: prod-pod-management
rules:
- apiGroups: ["*"]
  resources: ["deployments"]
  verbs: ["*"]

---

apiVersion: rbac.authorization.k8s.io/v1
kind: RoleBinding
metadata:
  name: jenkins-prod-rolebinding
  namespace: prod
subjects:
- kind: ServiceAccount
  name: jenkins-prod
  namespace: devops-tools
roleRef:
  kind: Role
  name: prod-pod-management
  apiGroup: rbac.authorization.k8s.io
这里创建了一个jenkins-prod的用户,并且可以操作 namespace为 prod下的deployments所有行为
- 我这里
jenkins-prod只需要操作prod下的权限所以使用Role - 如果想操作任意
namespace下的资源 使用ClusterRole - 使用 RBAC 鉴权 | Kubernetes
打包镜像
我的jenkinis是部署在k8s的环境中,无法使用docker来进行打包,所以这里使用kanikoGoogleContainerTools/kaniko: Build Container Images In Kubernetes (github.com)来进行镜像打包和上传到私有镜像仓库,所以需要提前准备一份docker login的Secret
流水线
ok,在一切都准备好了就可以创建一个流水线项目,并编写对应流水线代码
这里需要注意几点:
- 我要定义了
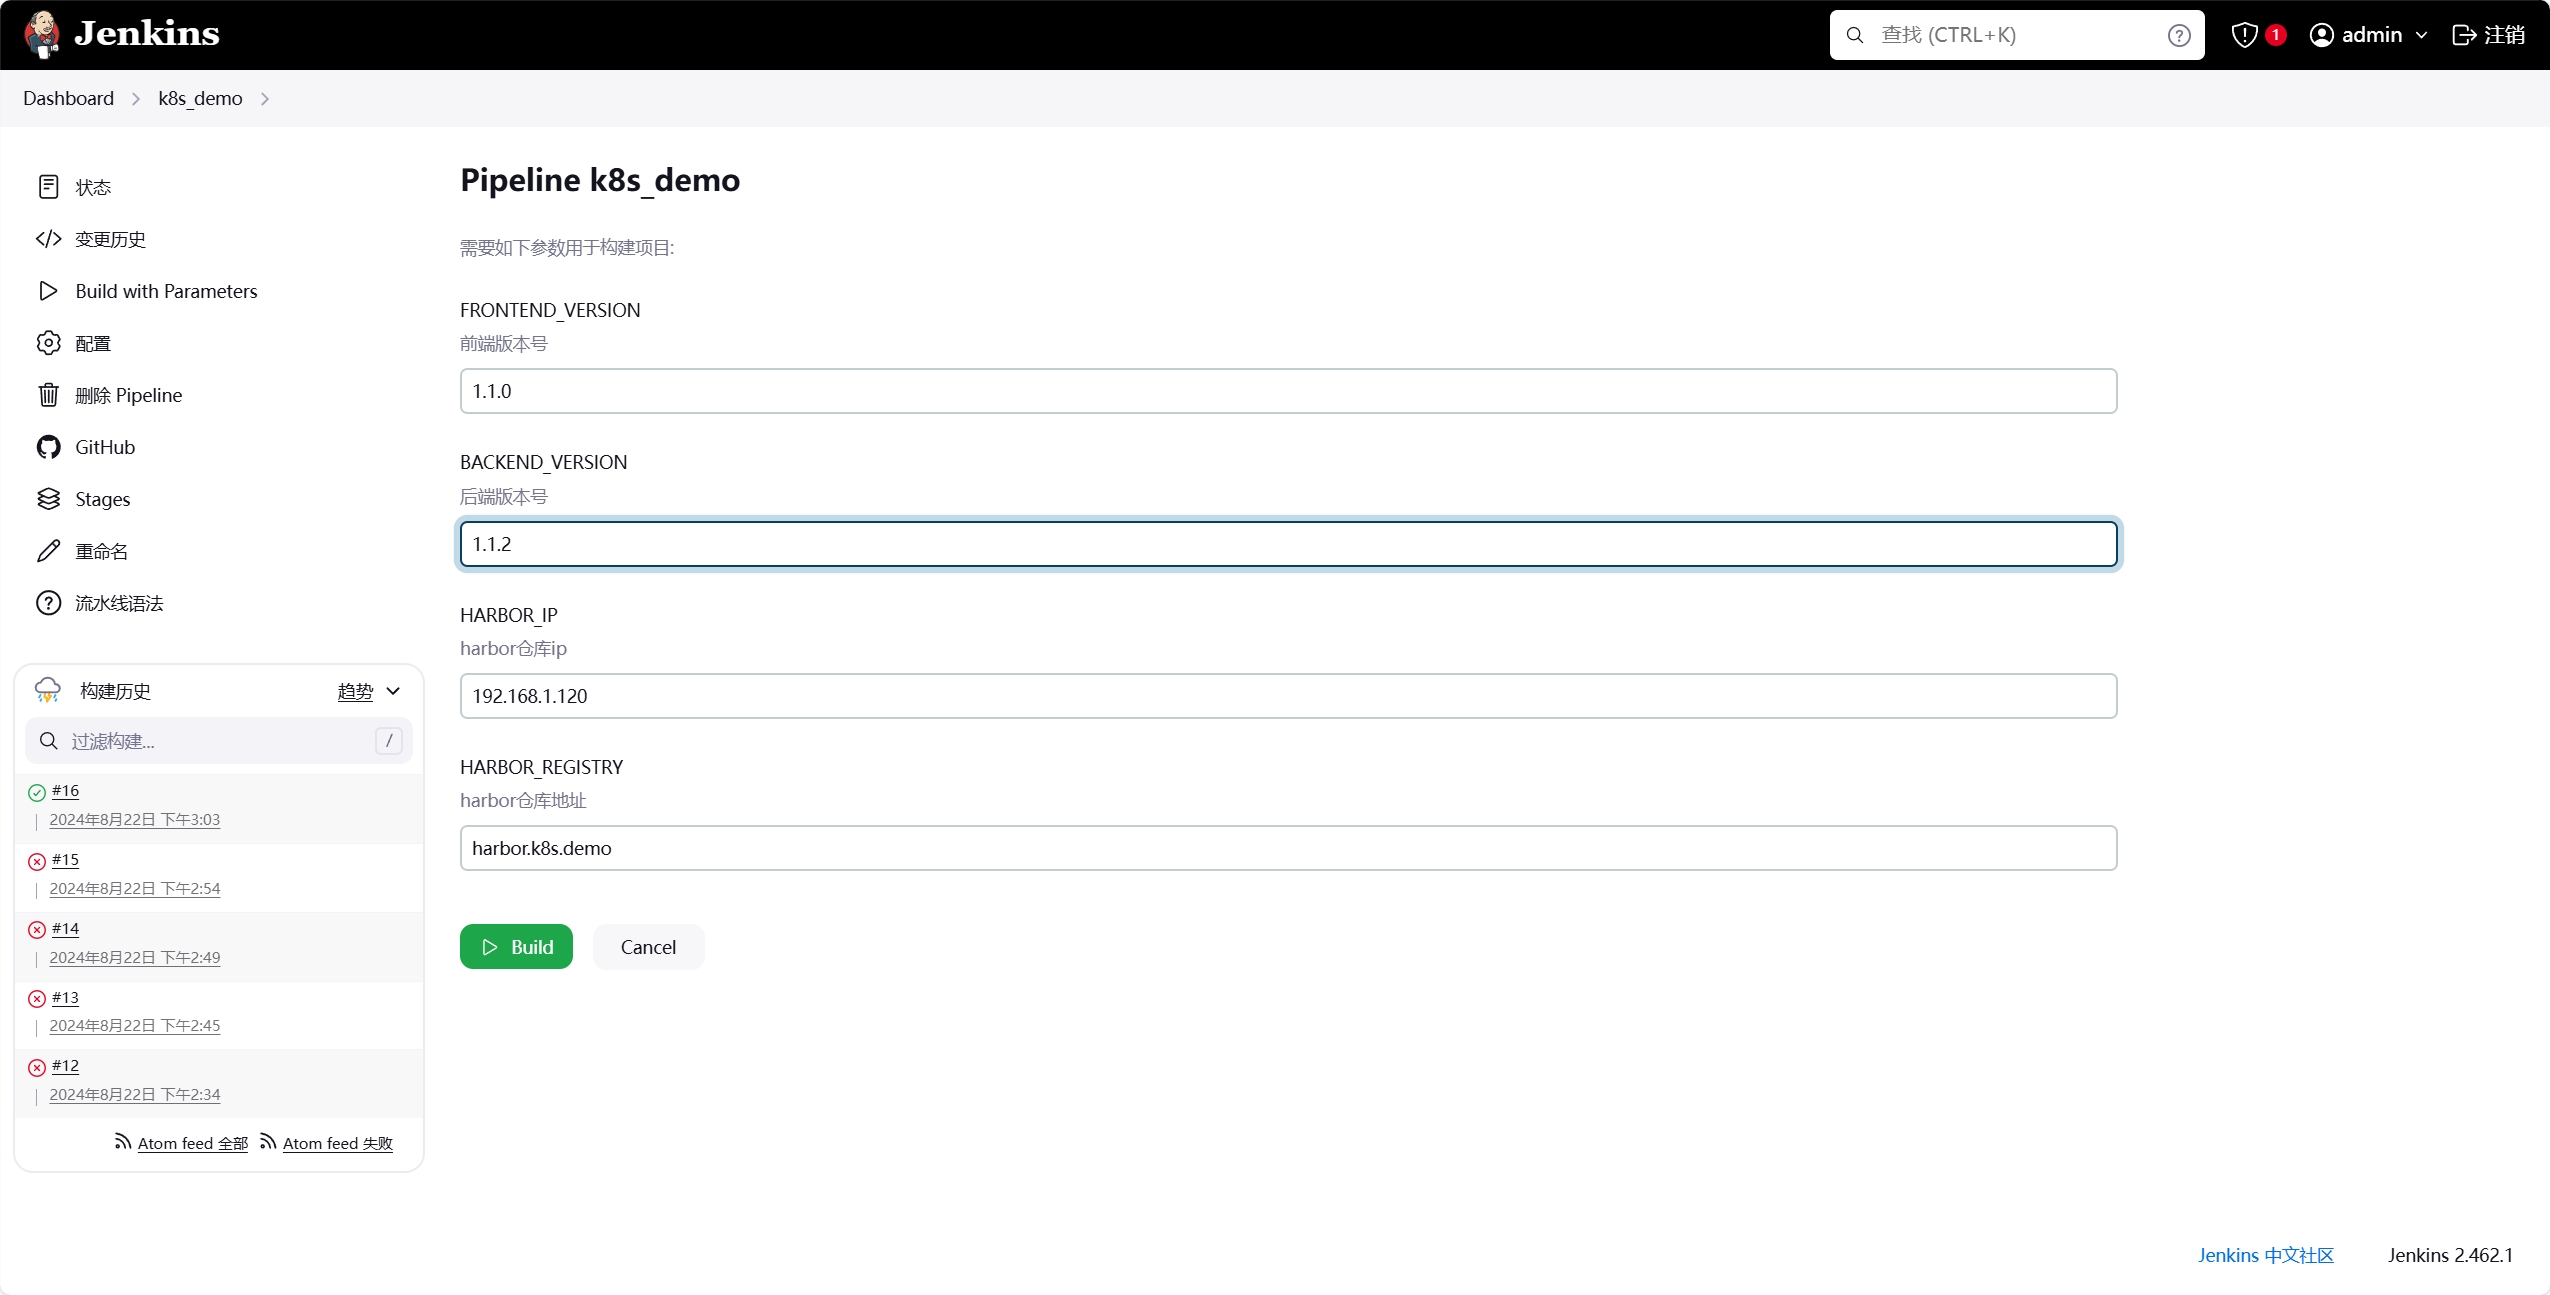
parameters就是在执行流水线前,要输入本次构建的版本号和镜像地址配置,这样打包出来的镜像都会存在版本信息,方便追踪和管理
parameters {
    string(name: 'FRONTEND_VERSION', defaultValue: '1.0.0', description: '前端版本号')
    string(name: 'BACKEND_VERSION', defaultValue: '1.0.0', description: '后端版本号')
    string(name: 'HARBOR_IP', defaultValue: '192.168.1.120', description: 'harbor仓库ip')
    string(name: 'HARBOR_REGISTRY', defaultValue: 'harbor.k8s.demo', description: 'harbor仓库地址')
}
在使用
agents时要进行一定的配置缓存配置,通过nfs挂载
go和npm的目录来进行资源缓存配置
serviceAccountName为我创建的jenkins-prod,serviceAccountName可以为pod指定一个账号,如果不指定那么账号将会时该namespace下的default它是没有权限操作其他namesapce下的资源的 为 Pod 配置服务账号 | Kubernetes因为在这个镜像里面,执行的用户是
jenkins,但是挂载缓存的权限是root,所以是无法访问到的,但是通过修改securityContext.fsGroup容器中所有进程会是其附组ID的一部分,所以这样就可以把缓存的权限分配到jenkins中,使其有足够的权限操作缓存那为什么是1000捏?因为在镜像定义的时候,就指定了容器内用户和组ID 都为1000
agent {
    kubernetes {
        yaml '''
        apiVersion: v1
        kind: Pod
        metadata:
          name: jenkins-slave
        spec:
          serviceAccountName: jenkins-prod
          securityContext:
            fsGroup: 1000
          containers:
          - name: jnlp
            image: harbor.k8s.demo/library/jenkins/inbound-agent-k8s-demo:alpine3.20-jdk17
            resources:
              limits:
                memory: "1Gi"
                cpu: "1000m"
              requests:
                memory: "256Mi"
                cpu: "250m"
            volumeMounts:
              - name: go-cache
                mountPath: /home/jenkins/go
              - name: npm-cache
                mountPath: /home/jenkins/.npm
          volumes:
          - name: go-cache
            nfs:
              server: 192.168.1.125
              path: /mnt/nfs_share/go-cache
          - name: npm-cache
            nfs:
              server: 192.168.1.125
              path: /mnt/nfs_share/npm-cache
        '''
    }
}- 在构建镜像时,使用了
kaniko作为agents- 这里使用的版本为
debug因为流程是启动agents,等待jnlp对其进行连接,连接成功了才可以使用,所以不能让pod退出,而debug的版本是有busybox shell可以使用sleep 99d是pod不会退出 - 这里就是挂载了上述配置的
docker login后的config.json文件,保证了推送到私有仓库的权限
- 这里使用的版本为
agent {
               kubernetes {
                   yaml '''
                   apiVersion: v1
                   kind: Pod
                   metadata:
                     labels:
                       app: kaniko
                   spec:
                     containers:
                     - name: kaniko
                       image: harbor.k8s.demo/library/kaniko-project/executor:v1.23.2-debug
                       command: ["sleep","99d"]
                       volumeMounts:
                       - name: kaniko-secret
                         mountPath: /kaniko/.docker
                     volumes:
                       - name: kaniko-secret
                         secret:
                           secretName: harbor-login
                           items:
                             - key: .dockerconfigjson
                               path: config.json
                   '''
               }
}- 构建镜像命令
- 在构建的时候需要把所需要的文件从上一个
steps中获取,这里使用了stash和unstashPipeline: Basic Steps (jenkins.io)- 在小文件的时候可以这样使用,但是如果文件过多或太大,会影响流水线执行的效率,这个时候可以考虑使用外部挂载,给构建的agents添加一个新的挂载,把打包的所需文件复制到其中,在打包pod中挂载该
volumne也可以获取所需的文件
- 在小文件的时候可以这样使用,但是如果文件过多或太大,会影响流水线执行的效率,这个时候可以考虑使用外部挂载,给构建的agents添加一个新的挂载,把打包的所需文件复制到其中,在打包pod中挂载该
- 这里把版本配置到了镜像中,这样可以通过配置文件快速了解其对应的后端和前端的版本
- 在构建的时候需要把所需要的文件从上一个
    steps {
        parallel (
            '构建前端镜像': {
                unstash 'frontend-artifact'
                container('kaniko') {
                    sh "echo ${params.HARBOR_IP} ${params.HARBOR_REGISTRY} >> /etc/hosts"
                    sh """
                        /kaniko/executor  --context `pwd`/web/k8s/front/docker -f `pwd`/web/k8s/front/docker/Dockerfile \
                        --skip-tls-verify \
                        --force \
                        --destination ${params.HARBOR_REGISTRY}/k8s_demo/front:${params.FRONTEND_VERSION}
                    """
                }
            },
            '构建后端镜像': {
                unstash 'backend-artifact'
                container('kaniko') {
                    sh "echo ${params.HARBOR_IP} ${params.HARBOR_REGISTRY} >> /etc/hosts"
                    sh """
                        /kaniko/executor --context `pwd`/web/k8s/back/docker --dockerfile `pwd`/web/k8s/back/docker/Dockerfile \
                        --skip-tls-verify \
                        --force \
                        --destination ${params.HARBOR_REGISTRY}/k8s_demo/back:${params.BACKEND_VERSION}
                    """
                }
            }
        )
    }
}
k8s更新部署
这里利用了
annotate给每个版本都rollout histroy都配置了change-cause方便后期进行版本回退和查看同时利用了
rollout restart来进行滚动更新滚动更新是 Kubernetes 提供的一种部署更新策略,它逐步替换 Pod 的旧版本,确保在更新过程中始终保持应用程序的可用性。
- 零停机时间 (Zero Downtime): 这是滚动更新最大的优势。在更新过程中,旧 Pod 会逐步被新 Pod 替换,而不会一次性停止所有旧 Pod。这保证了应用在更新过程中始终至少有一部分实例在运行,避免了服务中断。
- 控制更新速度: 你可以控制滚动更新的速度,例如一次更新多少个 Pod,以及每次更新之间等待的时间。这让你可以根据应用的实际情况和风险承受能力来调整更新节奏。
- 回滚能力: 如果新版本出现问题,你可以轻松地回滚到之前的版本。Kubernetes 会保留旧 Pod 的历史版本,方便你快速回滚。
滚动更新的配置
在 Kubernetes 中,你可以通过 Deployment 对象来管理应用的部署和更新。以下是配置滚动更新的一些关键参数:
strategy.type: RollingUpdate: 指定使用滚动更新策略。strategy.rollingUpdate.maxSurge: 指定在更新过程中,可以额外创建的最大 Pod 数量。例如,设置为20%表示可以额外创建当前 Pod 数量 20% 的 Pod。strategy.rollingUpdate.maxUnavailable: 指定在更新过程中,不可用 Pod 的最大数量或百分比。例如,设置为25%表示在更新过程中,最多允许 25% 的 Pod 不可 用。minReadySeconds: 指定新 Pod 进入 “Ready” 状态后,需要等待的最短时间(秒),才会被认为是可用的,并继续更新其他 Pod。
所以最好每个应用的副本数至少为2,这样在滚动更新时可以做到继续服务
stage('更新K8s部署') {
            steps {
                script {
                    sh """
                    sed -i 's|image: .*k8s_demo/.*|image: ${HARBOR_REGISTRY}/k8s_demo/back:${params.BACKEND_VERSION}|g' ./web/k8s/back/k8s/k8sDemoBack.yaml
                    sed -i 's|image: .*k8s_demo/.*|image: ${HARBOR_REGISTRY}/k8s_demo/front:${params.FRONTEND_VERSION}|g' ./web/k8s/front/k8s/k8sDemoFront.yaml
                    kubectl apply -f ./web/k8s/back/k8s/k8sDemoBack.yaml
                    kubectl apply -f ./web/k8s/front/k8s/k8sDemoFront.yaml
                    kubectl annotate deployment k8s-demo-front-end -n prod  kubernetes.io/change-cause="ci/cd update version to ${params.BACKEND_VERSION}"
                    kubectl annotate deployment k8s-demo-back-end -n prod  kubernetes.io/change-cause="ci/cd update version to ${params.BACKEND_VERSION}"
                    kubectl rollout restart deployment -n prod -l app=k8s-demo-front-end
                    kubectl rollout restart deployment -n prod -l app=k8s-demo-back-end
                      """
                }
            }
        }
最后完整的配置文件在 k8s_demo/web/jenkins/jenkins.pipeline at main · kehaha-5/k8s_demo (github.com)
执行
在执行的时候可以配置对应的版本和镜像信息
在执行成功后可以查看对应的记录
#查看滚动更新过程
root@node-m:~# kubectl rollout status  deployment  -n prod -l app=k8s-demo-back-end
deployment "k8s-demo-back-end" successfully rolled out
root@node-m:~# kubectl rollout status  deployment  -n prod -l app=k8s-demo-back-end
Waiting for deployment "k8s-demo-back-end" rollout to finish: 1 out of 2 new replicas have been updated...
Waiting for deployment "k8s-demo-back-end" rollout to finish: 1 out of 2 new replicas have been updated...
Waiting for deployment "k8s-demo-back-end" rollout to finish: 1 old replicas are pending termination...
Waiting for deployment "k8s-demo-back-end" rollout to finish: 1 old replicas are pending termination...
deployment "k8s-demo-back-end" successfully rolled out
#查看滚动更新历史记录
root@node-m:~# kubectl rollout history deployment  -n prod -l app=k8s-demo-back-end
deployment.apps/k8s-demo-back-end
REVISION  CHANGE-CAUSE
1         <none>
2         <none>
3         <none>
4         <none>
5         ci/cd-update-version-to-1.0.0
6         ci/cd update version to 1.1.2
7         ci/cd update version to 1.1.2
8         ci/cd update version to 1.1.5
9         ci/cd update version to 1.1.5
#查看目前pod信息
root@node-m:~# kubectl get pods -n prod -l app=k8s-demo-back-end
NAME                                 READY   STATUS    RESTARTS   AGE
k8s-demo-back-end-5c74755bcd-cgt78   1/1     Running   0          2m13s
k8s-demo-back-end-5c74755bcd-md6j2   1/1     Running   0          2m14s
ok,以上就是实现了在k8s中部署jenkins和harbor实现自动交付流水线