最近有一个朋友他想让我帮他部署一个几年前的php项目,既然是几年前的就项目了,为什么还要重新部署捏?那肯定是还有剩余价值啊
框架升级
在部署项目之前,先看一下这个项目有什么安全问题,发现在github的Dependabot alerts给我报告了10个左右的安全问题,看了一下,除了老生常谈的php序列化漏洞以外,剩下的都可以通过升级依赖来进行解决,所以第一件事就是先把项目的依赖进行升级
项目结构 && 依赖安装
ok,依赖升级好了,就先clone下来看一下目录结构先。利用tree命令查看项目结构
kehaha@DESKTOP-4GO6ORF:~/docker/xxxxx$ tree -L 2
.
└── xxxxx
    ├── README.md
    ├── back_end
    └── font_end

3 directories, 1 file
不难发现,这个项目是一个前后端分离的项目.
back_end
先看一下后端的文件,点开来看bank_end进行查看,先看一下php用来管理依赖的composer.json
"require": {
    "php": ">=7.1.0",
    "topthink/framework": "^6.0.0",
    "topthink/think-orm": "^2.0",
    "topthink/think-multi-app": "^1.0",
    "topthink/think-captcha": "^3.0",
    "thans/tp-jwt-auth": "^1.1",
    "phpoffice/phpspreadsheet": "^1.17"
},
好的这个项目用到了thinkphp6,要求的php版本要大于 7.1。既然这样先利用composer来安装后端的依赖。
因为我的电脑里面没有安装php和composer 所以这次就利用docker来安装依赖,这里选择的是composer:1.8.2的镜像
kehaha@DESKTOP-4GO6ORF:~/docker/xxxx/xxxx/back_end$ docker run --rm --interactive --tty   --volume $PWD:/app composer:1.8.2 composer i
Loading composer repositories with package information
Installing dependencies (including require-dev) from lock file
Your requirements could not be resolved to an installable set of packages.

  Problem 1
    - Installation request for phpoffice/phpspreadsheet 1.17.1 -> satisfiable by phpoffice/phpspreadsheet[1.17.1].
    - phpoffice/phpspreadsheet 1.17.1 requires ext-gd * -> the requested PHP extension gd is missing from your system.

  To enable extensions, verify that they are enabled in your .ini files:
    -
    - /usr/local/etc/php/conf.d/date_timezone.ini
    - /usr/local/etc/php/conf.d/docker-php-ext-sodium.ini
    - /usr/local/etc/php/conf.d/docker-php-ext-zip.ini
    - /usr/local/etc/php/conf.d/memory-limit.ini
  You can also run `php --ini` inside terminal to see which files are used by PHP in CLI mode.
依赖安装失败了因为需要安装gd扩展,看来不如直接安装php然后安装完所需要的扩展最后再安装composer来下载依赖。所以这次直接利用docker的php来安装的框架依赖和扩展依赖,这里我选择的php:7.3.33-zts-alpine3.14。
那么php如何快速安装扩展,可以参考hub.dockerphp的overview。这里我选择的使用docker-php-extension-installer来安装扩展。
首先先启动php:7.3.33的容器并把项目挂载到容器内,然后进入容器,安装脚本,安装依赖
install-php-extensions gd zip @composer #后面发现还要安装zip安装完成后,利用composer i安装框架依赖
Generating autoload files
> @php think service:discover
Succeed!
> @php think vendor:publish
File /app/config/jwt.php exist!
File /app/config/captcha.php exist!
File /app/config/trace.php exist!
Succeed!
9 packages you are using are looking for funding.
Use the `composer fund` command to find out more!
那么后端框架依赖就安装完成了。
front_end
进到前端的文件,看了一下是一个vue2的项目,我的电脑是安装了nvm的,因此可以不用docker来安装依赖和打包项目。先用 nvm use 14 切换到 node14 的版本,然后用 npm i 和 npm run build:prod 来进行依赖和项目的安装
编写部署文件
因为整个项目要用到mysql nginx php-fpm因此利用docker-compose来进行项目部署。首先编写docker-compose.yaml,把要利用到的镜像和端口都进行配置,这里不用挂载是因为这个项目只是跑来测试,不是正式上线,所以就没有使用volume进行文件挂载了。
docker-compose.yaml
version: "3.8"

networks:
  web_network:

services:
  back:
    container_name: php_back
    build: ./php/
    networks:
      - web_network
    depends_on:
      - _front
      - _mysql
    restart: always
    tty: true

  front:
    build: ./nginx/
    container_name: _front
    networks:
      - web_network
    ports:
      - "4416:80"
    restart: always

  mysql:
    build: ./mysql/
    container_name: _mysql
    networks:
      - web_network
    ports:
      - "44166:3306"
restart: always这里可能就有问题了,所有容器虽然再同一个compose中,但是容器自己是如何访问对方的捏。其实这里我定义了一个web_network那么它们都在这个网络里面的话,可以直接通过容器名来访问对方。
官方文档
nginx
这里单独编写nginx的Dockerfile是因为要进行一些配置
FROM nginx:stable

COPY ./dist/ /usr/share/nginx/html/ #复制前端打包好的文件进入

COPY ./default.conf /etc/nginx/conf.d/

EXPOSE 80
server {
    listen       80;
    listen  [::]:80;
    server_name  localhost;

    location / {
        root   /usr/share/nginx/html;
        index  index.html index.htm;
    }
    error_page   500 502 503 504  /50x.html;
    location = /50x.html {
        root   /usr/share/nginx/html;
    }

    location ~ \.php$ {
        root           html;
        fastcgi_pass   php_back:9000; #php的容器名称
        fastcgi_index  index.php;
        fastcgi_param  SCRIPT_FILENAME  /var/www/html/$fastcgi_script_name; #这个/var/www/html/是php容器中项目存放的位置,就是通过获取要执行的php文件位置来调用cgi来执行对应的php文件
        include        fastcgi_params;
    }
}
php
这里的php我使用的是 php:7.3-fpm-alpine3.14 为什么捏,在 dockerhub 的 php overview 中有如下解释。官方文档
php:<version>-fpm
This variant contains PHP-FPM, which is a FastCGI implementation for PHP. See the PHP-FPM website for more information about PHP-FPM.

In order to use this image variant, some kind of reverse proxy (such as NGINX, Apache, or other tool which speaks the FastCGI protocol) will be required.

Some potentially helpful resources:

PHP-FPM.org
simplified example by @md5
very detailed article by Pascal Landau
Stack Overflow discussion
Apache httpd Wiki example
WARNING: the FastCGI protocol is inherently trusting, and thus extremely insecure to expose outside of a private container network -- unless you know exactly what you are doing (and are willing to accept the extreme risk), do not use Docker's --publish (-p) flag with this image variant.
我们是利用nginx来访问cgi来调用php的,因此我们要使用fpm的版本。
如下是php的Dokerfile
FROM php:7.3-fpm-alpine3.14

RUN curl -sSLf \
        -o /usr/local/bin/install-php-extensions \
        https://github.com/mlocati/docker-php-extension-installer/releases/latest/download/install-php-extensions && \
    chmod +x /usr/local/bin/install-php-extensions && \
    install-php-extensions gd zip #安装依赖 gd zip

COPY ./back_end /var/www/html/

RUN mv "$PHP_INI_DIR/php.ini-production" "$PHP_INI_DIR/php.ini"

EXPOSE 9000
mysql
mysql的Dockerfile文件:
这里我的mysql用的版本是5.7.36
FROM mysql:5.7.36

COPY ./my.cnf /etc/mysql/conf.d/ #mysql的配置文件
COPY ./xxxx.sql /docker-entrypoint-initdb.d/xxxx.sql #复制提前准备好的sql文件进入容器,容器在初始化的时候会执行对应的sql

# 定义环境变量
ENV MYSQL_USER="xxxx" #创建用户,一般我项目部署的话不会使用root用户,会单独创建一个用户,该用户只有该库的所有权限
ENV MYSQL_PASSWORD="xxxxx" #创建用户的密码
ENV MYSQL_ROOT_PASSWORD="xxxx" # root用户的密码

# 官方文档
# https://hubgw.docker.com/_/mysql#:~:text=Initializing%20a%20fresh,the%20MYSQL_DATABASE%20variable.
# https://hubgw.docker.com/_/mysql#:~:text=MYSQL_DATABASE,to%20this%20database.
# ENV MYSQL_DATABASE="xxxx" 可以创建指定名称的数据库,并且在执行时sql时会默认使用该数据库

EXPOSE 3306
my.cnf文件
[mysqld]
default-time_zone = '+8:00'
character-set-server=utf8mb4
collation-server=utf8mb4_general_ci

[client]
default-character-set=utf8mb4
sql文件
CREATE DATABASE IF NOT EXISTS xxxx  DEFAULT CHARACTER SET utf8mb4  COLLATE utf8mb4_unicode_ci; //创建数据库
FLUSH PRIVILEGES;
use xxxx;
SET FOREIGN_KEY_CHECKS=0;
-- ----------------------------
-- Table structure for xxx
-- ----------------------------
DROP TABLE IF EXISTS `xxx`;
CREATE TABLE `xxx` (
  `xxxx` int(11) NOT NULL AUTO_INCREMENT,
  `xx` int(11) DEFAULT NULL COMMENT '中文',
  `xxx` varchar(11) DEFAULT NULL COMMENT '中文',
  `xxx` decimal(10,0) DEFAULT NULL COMMENT '中文',
  PRIMARY KEY (`xxxx`)
) ENGINE=InnoDB DEFAULT CHARSET=utf8mb4;

.........
ok,所有配置文件编写好了,可以进行部署了。
部署
使用 docker composer up -d --build 来构建和部署项目,部署完成访问127.0.0.1:4416,ok访问成功,查看容器的数据库也看到有对应的表了
问题
虽然部署成功,但是还存在着一些问题
api
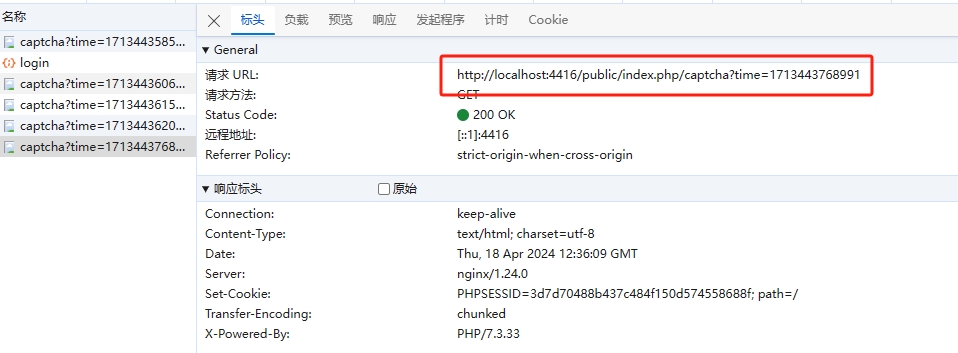
我的api接口为 /public/index.php/xxx/xxx 太长了,我想使用 /api/xxx 来代替。那么如何进行替代了,肯定是使用nginx进行配置
- 首先,先在前端的
.env.production文件中修改API参数 并且进行打包
# just a flag
ENV = 'production'

# base api
VUE_APP_BASE_API = '/public/index.php' -> '/api'
VUE_APP_UPLOAD_API = '/public/index.php/admin/user/Upload' -> '/api/admin/user/Upload'
VUE_APP_DOWNLOAD_API = '/public/index.php/admin/user/download' -> '/api/admin/user/download'
- 修改
nginx配置文件中处理php请求的部分location ~ ^/api/(.*)$ { # (.*)$ 把 /api/abc/xxx 中的/abc/xxx变成 $1 root root; fastcgi_pass php_back:9000; fastcgi_index index.php; fastcgi_param SCRIPT_FILENAME /var/www/html/public/index.php; fastcgi_param PATH_INFO /$1; #设置 PATH_INFO 定义thinkphp6的路由 include fastcgi_params; } - 就可以成功访问了
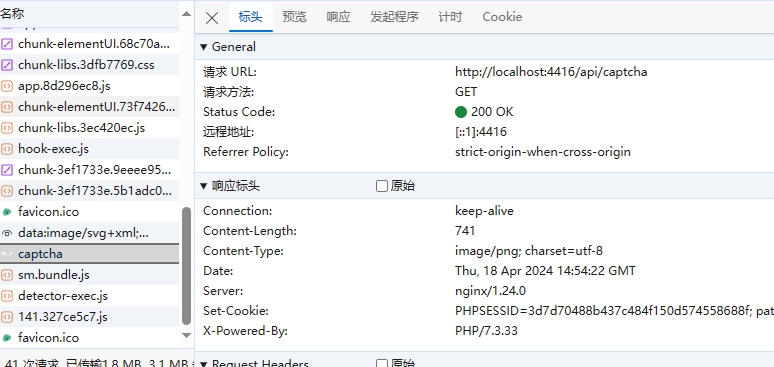
这里有一个问题为什么 把路由设置到 PATH_INFO 就可以成功访问,因为thinkphp支持通过PATH_INFO来访问 文档
mysql扩展
当访问数据库的api时发现如下问题
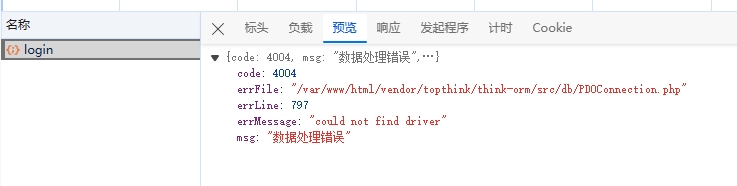
通过查询pdo发现还需要安装驱动 PDO_MYSQL
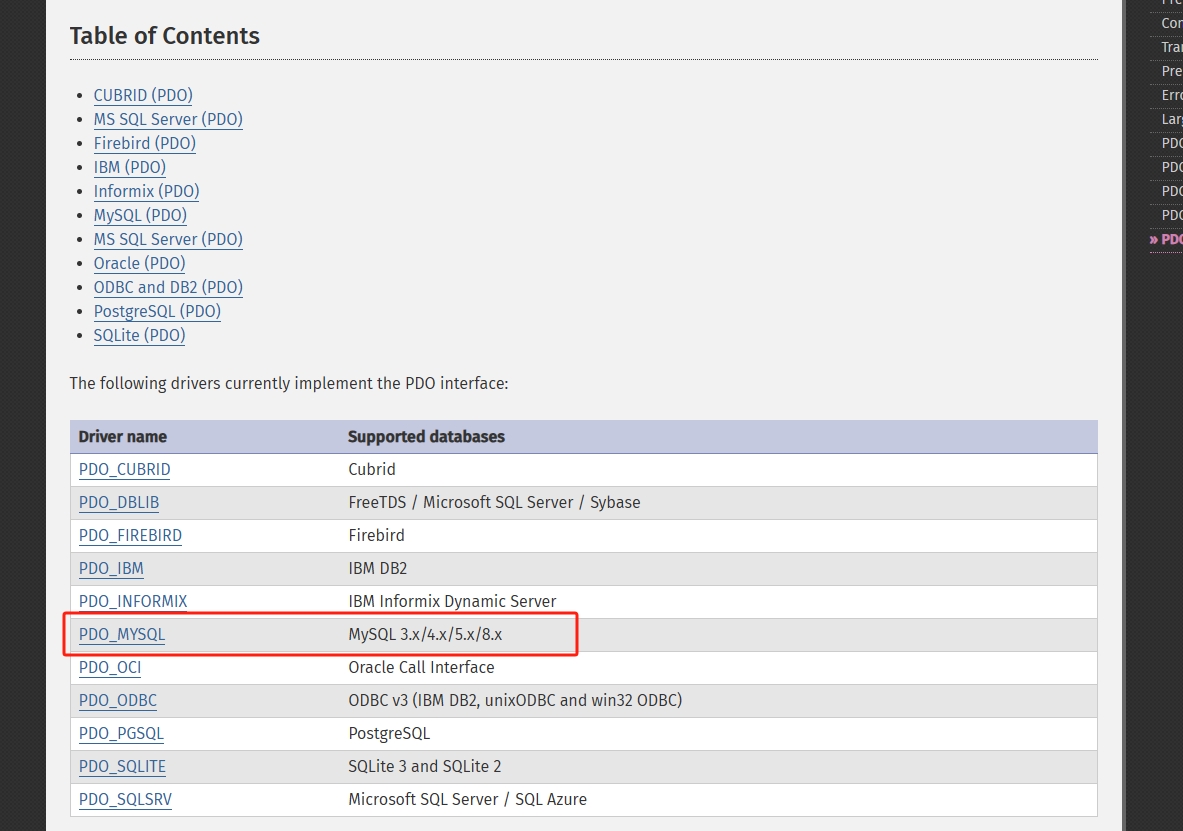
在php的Dockefile修改为
......

RUN curl -sSLf \
        -o /usr/local/bin/install-php-extensions \
        https://github.com/mlocati/docker-php-extension-installer/releases/latest/download/install-php-extensions && \
    chmod +x /usr/local/bin/install-php-extensions && \
    install-php-extensions gd zip PDO_MYSQL #

......
session
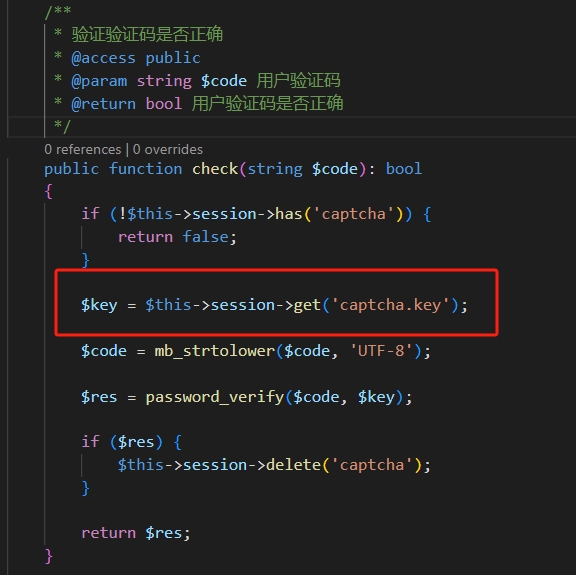
当所有都安装好了,但是当要用到验证码进行登陆的时候,却一直显示验证码错误?由于那个验证码使用topthink/think-captcha来生成的,所有直接点开对应的源码看看是如何生成验证码的
首先是验证码的生成,我发现里面调用了session方法把验证码的值放到了session里面
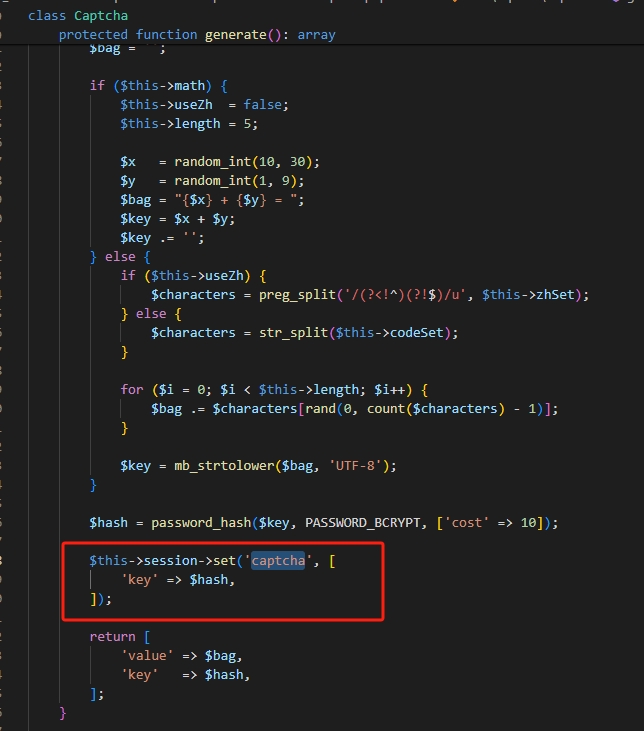
在验证验证码的时候,就是从session里面获取key来进行验证的
而session在这个项目中是以文件的形式保存在 runtime 目录里面的,所以我进入了php的容器,查看runtime目录发现什么文件都没有生成,甚至log文件都没有生成
/var/www/html # ls ./runtime/
/var/www/html #所以很有可能就是权限有问题,所以在php的Dockerfile中,把runtime目录的权限改成777
......
RUN mv "$PHP_INI_DIR/php.ini-production" "$PHP_INI_DIR/php.ini" && chmod 777 /var/www/html/runtime
......
改了以后问题就顺利解决了,对应的访问log也有了
/var/www/html # ls ./runtime/*
./runtime/log:
202404

./runtime/session:
sess_3d7d70488b437c484f150d574558688f
至此,顺利通过 docker-compose 部署了一个php的web项目